
When you create a form with HTML, you usually want users to provide certain information before submitting it. For example, if you create a registration form, you may need the user’s name, email address, and password. Leaving these fields empty could cause problems because your website would receive incomplete information.
HTML provides a simple solution for this: the required attribute.
The required attribute tells the browser that a particular form field must be completed before the form can be submitted. It is one of the easiest HTML attributes to learn, but it is also very useful when building contact forms, registration pages, login forms, checkout pages, surveys, and other interactive websites.
In this guide, you will learn what the required attribute means, how it works, where it can be used, what happens when a user leaves a required field empty, and some common mistakes beginners should avoid.
The explanations will focus mainly on understanding the concept rather than filling the article with code.
What Is the required Attribute?
The required attribute is an HTML attribute that tells the browser that a form control must contain a value before the form can be submitted.
In simple words, it means:
“This field cannot be left empty.”
For example, imagine a contact form asking for a visitor’s name and email address. You may decide that both pieces of information are necessary.
By adding required to those fields, the browser checks them before allowing the form to be submitted.
If the visitor fills them in, the form can continue normally.
If the visitor leaves a required field empty, the browser displays a validation message and asks the user to complete it.
This happens without requiring you to write JavaScript for basic required-field validation.
A Simple Example
Here is a basic example:
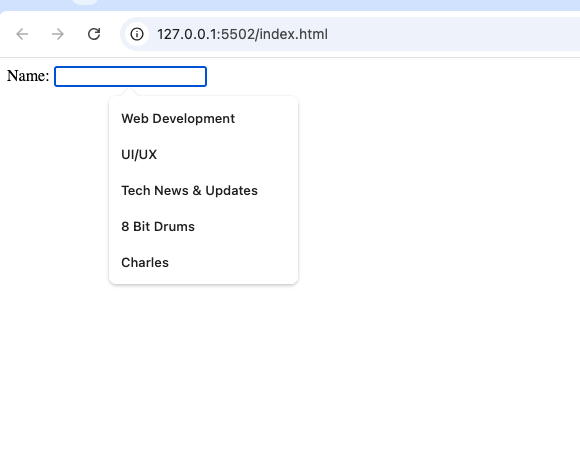
<label for="name">Name:</label>
<input type="text" id="name" required>
The important part is the required attribute.
There is no value assigned to it. You simply place required inside the form element.
This tells the browser that the name field must be completed.
Why Is the required Attribute Useful?
Forms collect information from users, and some information is more important than other information.
For example, a newsletter subscription might only need an email address. A job application may require a name, email address, phone number, and other details.
Without required fields, users could submit the form without providing important information.
The required attribute helps prevent this.
It provides a simple first level of form validation directly in HTML.
How Does required Work?
The required attribute works with HTML form controls that support required-field validation.
When a user tries to submit a form, the browser checks the fields marked as required.
If a required field has been completed correctly, the browser allows the submission process to continue.
If the field is empty or does not satisfy the relevant requirement, the browser stops the submission and displays a validation message.
This is called client-side form validation.
The important thing to understand is that the browser performs the initial check for you.
You do not have to manually create a JavaScript function just to tell the user that a required text field is empty.
Which HTML Elements Can Use required?
The required attribute is mainly associated with HTML form controls.
It can be used with elements such as:
<input><select><textarea>
Different types of form controls can behave slightly differently when marked as required.
For example, a text input needs a value, while a checkbox has to be checked when it is required.
The exact validation behavior depends on the type of form control being used.
Using required With Text Inputs
Text inputs are one of the most common places where you will use the attribute.
Imagine a form asking for someone’s full name.
You do not want the visitor to submit the form without entering anything.
A required text field solves this problem.
<input type="text" name="fullname" required>
When the user tries to submit the form without entering a name, the browser prevents the form from being submitted.
The visitor will be asked to fill in the field.
Using required With Email Fields
Email addresses are also commonly required.
For example, a contact form usually needs an email address so that the website owner can respond to the visitor.
You can combine the required attribute with an email input.
<input type="email" name="email" required>
Here, two types of validation can happen.
First, the field cannot be empty because it is required.
Second, because the input type is email, the browser can also check whether the value looks like an email address.
This is a good example of how HTML attributes can work together.
Using required With Password Fields
Registration and login forms commonly require passwords.
A password field can also be marked as required.
<input type="password" name="password" required>
The browser will not allow the form to be submitted while the required password field remains empty.
However, remember that required only checks that a value has been provided. It does not automatically make a password strong.
If your website requires a minimum password length or a particular combination of characters, you need additional validation.
Using required With <textarea>
The <textarea> element is commonly used for longer messages.
For example, a contact form may require visitors to explain why they are contacting the website.
You can make the message field required.
<textarea name="message" required></textarea>
Now the visitor must enter some text before the form can be submitted.
This is useful when an empty message would not be useful to the person receiving the form.
Using required With <select>
The required attribute can also be useful with dropdown menus.
Imagine a form asking users to select their country.
If choosing a country is necessary, the selection can be required.
The important thing is to design the first option carefully so that it does not accidentally count as a meaningful answer.
For example, a placeholder such as “Select your country” can be used as the initial option, while the actual country options provide valid choices.
This encourages users to make a real selection before submitting the form.
Using required With Checkboxes
Checkboxes behave a little differently.
If a checkbox is marked as required, the user must check it before submitting the form.
This can be useful for agreements.
For example, a website may ask users to agree to its terms before creating an account.
<input type="checkbox" required>
The browser will prevent submission until the checkbox is selected.
This is particularly useful for consent or agreement fields.
Using required With Radio Buttons
Radio buttons are used when users need to select one option from a group.
For example, a form might ask:
How did you hear about us?
The options could include:
- Social media
- Friend
- Advertisement
When a radio group is required, the user needs to select an option before submitting the form.
This prevents the form from being submitted without an answer.
required Does Not Mean “Validate Everything”
This is an important point for beginners.
The required attribute mainly tells the browser that a value must be provided.
It does not automatically check every possible condition.
For example, suppose you have a required text field for a username.
The required attribute can make sure that the field is not empty.
But it does not automatically know whether:
- The username already exists
- The username is allowed
- The username belongs to the user
- The username meets your application’s rules
Those checks require additional validation, often on the server and sometimes with JavaScript.
required vs placeholder
These two features are often confused.
A placeholder provides a hint about what the user should enter.
For example, a placeholder might say:
Enter your email
The placeholder is not the same thing as making the field required.
The required attribute controls whether the field must contain a value.
A placeholder simply gives the user guidance.
You can use both together, but they have different purposes.
required vs value
Another common misunderstanding is confusing required with a default value.
The required attribute does not automatically put information inside a field.
It simply tells the browser that the user must provide a value.
For example, a required name field still starts empty unless you give it a value.
This distinction is important when building forms.
What Happens When a Required Field Is Empty?
Suppose you have a registration form with three required fields:
- Full name
- Password
A visitor fills in the name and email but forgets the password.
When the visitor clicks the submit button, the browser checks the form.
It discovers that the password field is required but empty.
Instead of submitting the form, the browser displays a validation message and directs the user’s attention to the field.
The exact wording and appearance of the message can vary depending on the browser and language settings.
This provides immediate feedback to the user.
The Browser Handles Basic Validation
One of the biggest advantages of the required attribute is that it uses built-in browser functionality.
You do not need to create a custom script just to check whether a simple required field is empty.
This makes HTML forms easier to build.
It can also reduce unnecessary JavaScript for basic validation.
However, built-in browser validation should not replace server-side validation.
Important: required Is Not a Security Feature
This is something every beginner should understand.
The required attribute improves the form experience, but it should not be treated as a security system.
A user can potentially bypass browser-side validation.
For that reason, information received by a server should always be validated on the server as well.
For example, if a website requires an email address, the server should not simply assume that the browser’s required check was enough.
A secure application validates submitted information independently.
Common Beginner Mistakes
1. Making Every Field Required
Not every piece of information needs to be mandatory.
If a form asks for information that is genuinely optional, do not mark it as required.
Forcing users to provide unnecessary information can make forms frustrating.
2. Thinking required Checks Data Quality
The attribute mainly checks whether a required value has been supplied.
It does not determine whether the information is correct or meaningful in every situation.
Additional validation may be necessary.
3. Forgetting Server-Side Validation
Browser validation is helpful, but it is not enough for applications that process important information.
Always validate submitted data on the server.
4. Using Unclear Form Labels
A required field should have a clear label so users understand what information they need to provide.
Instead of making visitors guess, explain what each field expects.
Best Practices for Using required
There are several simple practices that can make your forms easier to use.
Make Only Necessary Fields Required
Ask yourself whether the information is genuinely needed.
If it is optional, allow users to skip it.
Use Clear Labels
Users should immediately understand what each required field represents.
Provide Helpful Feedback
If a user misses a required field, the message should make it clear what needs to be completed.
Combine required With Other HTML Features
For example, an email field can use both the email input type and required.
Other HTML validation features can help check things such as length and acceptable patterns.
Validate Information on the Server
Never rely entirely on browser validation when processing important user data.
How required Improves User Experience
A well-designed form should guide users instead of making them guess.
Required fields provide an immediate indication that certain information is necessary before the form can continue.
This can prevent incomplete submissions and reduce confusion.
For example, imagine filling out a contact form and receiving an error only after the page reloads. That can be frustrating.
With built-in browser validation, users can receive immediate feedback before the form is submitted.
Where You Might Use required
You will find the required attribute useful in many types of websites.
Registration Forms
Name, email, and password may be required.
Contact Forms
A name, email, and message may be necessary.
Checkout Forms
Shipping and payment-related information may be required.
Surveys
Some questions may need an answer before the survey can be submitted.
Login Forms
A username or email and password are usually necessary.
Application Forms
Certain personal or professional details may be required.
A Simple Practice Project
A good way to learn the required attribute is to build a small contact form.
Create fields for:
- Full name
- Subject
- Message
Make the fields that are necessary for the form to work properly required.
Then open the page in your browser and try submitting the form without entering anything.
Observe what happens.
Next, complete the fields and try again.
This simple exercise will help you understand the behavior of the required attribute better than simply reading about it.
How required Fits Into HTML Forms
The required attribute is only one part of HTML form validation.
As you continue learning HTML, you will encounter other useful features such as:
minlengthmaxlengthminmaxpatterntypeplaceholder
Each serves a different purpose.
For example, required answers the question:
“Must the user provide something?”
Other attributes can help answer questions such as:
“How long should it be?”
“What format should it have?”
“What values are allowed?”
Learning these features together will make you much more comfortable building HTML forms.
Why Beginners Should Learn the required Attribute
The required attribute is a small HTML feature, but it teaches an important concept: websites can provide useful validation directly through HTML.
It also introduces beginners to the idea of creating forms that guide users and prevent simple mistakes.
Once you understand required, you can start experimenting with other form validation attributes and eventually move into more advanced JavaScript and server-side validation.
The HTML required attribute is a simple way to tell the browser that a form field must be completed before the form can be submitted.
It is useful for contact forms, registration pages, login forms, checkout pages, surveys, and many other projects.
The most important thing to remember is that required does not mean that HTML will verify every detail of the information a user enters. It mainly ensures that a required field is not left without a value and provides basic browser validation.
For beginners, it is an excellent HTML feature to practice because it requires very little code while providing a noticeable improvement to form usability.
As you continue learning HTML, try using required in small projects such as contact forms and registration pages. Once you understand how it behaves, combine it with other HTML validation features to create forms that are clearer, more useful, and easier for visitors to complete.